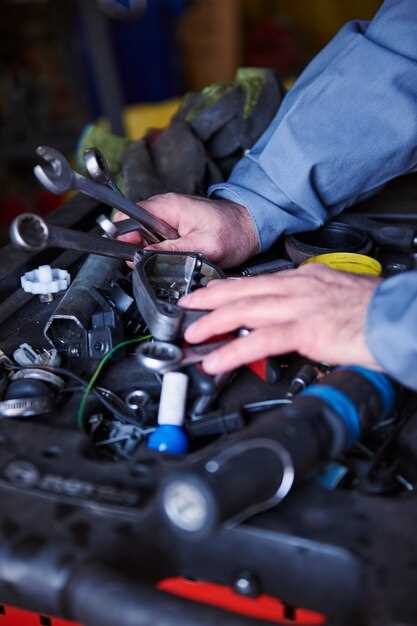
Oil leaks can lead to significant engine damage if left untreated, making it crucial for vehicle owners to understand how to identify and address this issue promptly. Regular maintenance and vigilant observation can help detect leaks early, ultimately prolonging the life of your engine. This article aims to provide practical guidance on recognizing oil leaks and implementing effective repair strategies.
Recognizing the signs of an oil leak is the first step in safeguarding your engine. Common indicators include oil stains beneath the vehicle, decreased oil levels on the dipstick, and the unmistakable smell of burning oil. Each of these symptoms signals that it is time to investigate further and address potential leaks before they escalate into more severe problems.
Repairing an oil leak may vary in complexity, depending on the source of the leak. Some minor leaks can be remedied with simple fixes, such as replacing a worn gasket or tightening loose connections. However, more serious leaks may require professional attention and comprehensive repairs. Understanding the potential causes of oil leaks, such as worn seals, cracks in engine components, or faulty oil filters, is essential for effective troubleshooting and repair.
Identifying Common Symptoms of Oil Leaks
Detecting an oil leak early is crucial to prevent significant engine damage. Various symptoms can indicate the presence of an oil leak in your vehicle. Recognizing these signs can help you address the problem promptly.
One of the most apparent symptoms is the presence of oil spots or puddles under your vehicle. These can vary in size and may have a distinct brown or black color, depending on the type of oil used in your engine. Regularly checking the ground where you park can help you spot these leaks early.
Another common symptom is the smell of burning oil. When oil leaks onto hot engine components, it can produce a characteristic burnt odor. If you notice this smell, it’s essential to inspect your engine as soon as possible.
An increase in engine oil levels is also a warning sign. Regularly monitoring your oil level is crucial; if you find that your oil level decreases quickly without an apparent reason, it might indicate a leak. Conversely, if you notice a sudden spike in oil levels, it may signal that oil is contaminating other fluids, pointing towards a possible issue.
In addition, keep an ear out for unusual engine noises. Low oil levels can lead to insufficient lubrication, resulting in knocking or ticking sounds from the engine. This can be a clear indication that oil is not circulating properly, potentially due to a leak.
When inspecting your vehicle, look for dark stains or grime on the engine. Oil leaks can cause buildup around the engine block, making it appear dirty or discolored. This residue is often sticky and may indicate that oil is escaping from seals or gaskets.
Lastly, keep an eye on the engine temperature gauge. If your engine is overheating, it could be due to a lack of lubrication from leaking oil. Overheating can cause severe damage, so addressing the issue immediately is crucial.
By being vigilant about these symptoms, you can pinpoint oil leaks early and take the necessary steps to repair them, ensuring the longevity and performance of your engine.
Utilizing Visual Inspection Techniques for Leak Detection

Visual inspection is a critical preliminary step in identifying oil leaks in your engine. It involves a thorough examination of the engine components and surrounding areas to spot any signs of oil seepage or pooling. Regularly scheduled inspections can help catch leaks early, preventing more serious engine damage and costly repairs.
Begin by examining the engine bay under adequate lighting. Pay close attention to the joints and seals, as these are common locations for leaks. Areas around the oil filter, valve cover, and oil pan should be inspected for any telltale signs of oil residue or buildup. A distinct shiny appearance on otherwise dull surfaces may indicate oil leakage.
Utilize a systematic approach during your inspection. Start from the top of the engine and work your way down, checking both the visible and hidden components. Use a flashlight to illuminate hard-to-see areas. If you notice any oil streaks or darkened surfaces, mark these spots for further assessment.
Another effective technique is to look for oil spots or puddles beneath the vehicle. A fresh oil leak often leaves a clear indication on the ground, which can guide you back to the source of the leak. Be sure to check the ground after the engine has been running and when it has been parked for some time.
Additionally, the use of colored dyes in engine oil can enhance visual inspection efforts. By adding a dye that fluoresces under UV light, you can create a more pronounced indication of leaks. This technique allows for precise localization of the leaking area, especially in complex engine layouts where visual access may be limited.
Finally, complement your visual inspection with proper maintenance practices. Regularly changing the oil and inspecting seals and gaskets as part of routine maintenance can help minimize the risk of leaks. Keeping your engine clean not only improves visibility during inspections but also helps detect new leaks promptly.
Understanding the Importance of Oil Level Monitoring
Regular monitoring of engine oil levels is critical for maintaining the overall health and performance of an engine. Oil serves as a lubricant, reducing friction between engine components and preventing wear and tear. When oil levels drop, lubrication becomes insufficient, leading to potential damage.
In addition, oil plays a vital role in cooling the engine. As the engine operates, it generates heat. Proper oil levels help absorb and dissipate this heat effectively, preventing overheating and maintaining optimal operating temperatures.
Furthermore, low oil levels can indicate leaks or other mechanical issues, necessitating immediate attention. Neglecting to monitor oil levels increases the risk of catastrophic engine failure, which can result in costly repairs or the need for a complete engine replacement.
Here’s a summary of the critical functions of regular oil level monitoring:
| Function | Importance |
|---|---|
| Lubrication | Reduces friction, minimizes wear and tear on engine components. |
| Cooling | Helps absorb and dissipate heat, preventing overheating. |
| Leak Detection | Identifies potential leaks or mechanical issues early on. |
| Cost Saving | Prevents costly repairs or engine replacements by ensuring adequate oil levels. |
In conclusion, monitoring oil levels is not just a routine task but a vital practice that contributes significantly to engine longevity and performance. Regular checks can save both money and time in the long run, ensuring a reliable and efficient vehicle operation.
Step-by-Step Guide to Locating Oil Leak Sources
Identifying the source of an oil leak is essential for maintaining engine health and preventing further damage. Follow this structured approach to locate oil leaks effectively.
Step 1: Prepare Your Vehicle
Ensure your vehicle is parked on a flat, dry surface. Turn off the engine and allow it to cool. Safety is paramount, so wear gloves and safety goggles to protect yourself from oil and other contaminants.
Step 2: Conduct a Visual Inspection
Start by visually examining the engine compartment and surrounding areas for oil spots or stains. Look for excessive oil buildup around gaskets, seals, and the oil filter. Don’t forget to check the undercarriage and the ground beneath the vehicle for any fresh oil puddles.
Step 3: Clean the Engine
If the engine is dirty, clean it using an engine degreaser. This will help you identify the leak more accurately. After cleaning, run the engine for a few minutes and allow it to idle while observing for any signs of leakage.
Step 4: Check Oil Filter and Oil Pan
Examine the oil filter for tightness; it should be secure but not over-tightened. Inspect the oil pan for cracks or damage, as these are common leak sources. Ensure the oil drain plug is also properly tightened and free from cracks.
Step 5: Inspect Gaskets and Seals
Pay close attention to gaskets and seals, particularly around the valve cover, timing cover, and rear main seal. Look for signs of wear, such as cracking or splitting, which could indicate a leak.
Step 6: Perform a Dye Test
If the source remains elusive, consider using a UV dye. Add the dye to the engine oil and run the engine. After a short period, shine a UV light over the engine to reveal glowing areas, which indicate the leak source.
Step 7: Monitor Oil Levels
Regularly check your oil levels. A continuous drop in oil levels can indicate a leak, even if visual signs are not present. Keep a log of your oil level measurements over time to track any significant drops.
Step 8: Consult a Professional
If you’re unable to locate the oil leak after these steps, it may be time to seek professional help. A mechanic can perform a comprehensive diagnostic to pinpoint the issue using specialized tools.
DIY Repair Methods for Minor Oil Leaks
Addressing minor oil leaks in your engine can save you time and money. Here are several effective DIY methods to tackle small leaks:
- Using an Engine Oil Stop Leak Additive:
Many products are designed to swell seals and gaskets, temporarily sealing minor leaks. Follow the manufacturer’s instructions for dosage and application.
- Sealant Application:
If the leak is coming from a specific area, identify the source and clean it thoroughly. After cleaning, apply a high-temperature RTV silicone sealant directly on the leak. Allow sufficient time for it to cure.
- Tightening Loose Bolts:
Engine components can sometimes loosen over time, leading to leaks. Carefully inspect all accessible bolts on the engine and tighten them if necessary, ensuring not to overtighten as this can cause damage.
- Replacing Gaskets:
For leaks originating from gaskets, you might consider replacing them. Remove the old gasket, clean the surfaces thoroughly, and install a new gasket. Ensure proper alignment and installation to avoid further leaks.
- Using a DIY Oil Leak Detector:
Sometimes identifying the exact source of a leak can be challenging. A homemade oil leak detector can assist: mix a small amount of UV dye specifically designed for detecting oil leaks into the engine oil. Run the engine and use a UV light to locate the leak.
- Regular Maintenance:
Regularly check oil levels and perform routine maintenance. Keeping your engine clean can help you spot leaks before they become significant issues.
Always remember to wear appropriate protective gear and follow all safety instructions when working on your vehicle. If the leak persists or worsens, consulting a professional mechanic may be necessary.
When to Seek Professional Help for Oil Leak Issues
Determining whether to handle an oil leak on your own or seek professional assistance depends on several factors. If you notice a persistent oil leak and are unsure of its source, it’s crucial to consult a mechanic. Attempting to diagnose or repair complex issues without adequate knowledge can lead to further damage.
Additionally, if the oil leak results in significant oil loss, this can affect engine performance and lead to potential engine failure. In such cases, it’s advisable to seek professional help immediately to prevent extensive repairs.
Another indicator to consider is the location of the leak. If it originates from hard-to-reach areas or involves critical components like the oil pan or cylinder head, a professional’s expertise is often required. Specialized tools and experience are necessary to effectively address these situations without causing harm.
Furthermore, if you observe any symptoms such as unusual engine noises, warning lights on your dashboard, or excessive smoke from the exhaust, these could signal deeper underlying issues related to the oil leak. A qualified technician can evaluate these symptoms and provide you with an accurate diagnosis.
Lastly, if you are not comfortable performing repairs or lack the necessary tools and equipment, it is highly recommended to seek professional help. The investment in expert services can save you time and potential costs associated with improper repairs.


