As temperatures drop, the last thing any homeowner wants to experience is a heater that blows cold air. This frustrating issue can make a cozy home feel unbearable during the winter months. Understanding the common causes and solutions for this problem is essential for effective repairs and maintaining a comfortable living space.
In this guide, we will explore various reasons why your heater might be releasing cold air, ranging from simple fixes to more complex issues that may require professional assistance. Whether you have a furnace, heat pump, or radiator system, knowing what to check can save you time and money in the long run. Proper maintenance not only enhances the heater’s efficiency but also extends its lifespan, ensuring reliable warmth when you need it most.
By following the steps outlined in this article, you will be better equipped to diagnose the problem, implement quick solutions, and determine when it is necessary to call in the experts. With a few straightforward actions, your heater can be restored to its optimal performance, allowing you to enjoy a warm and inviting atmosphere again.
Identifying the Main Causes of Cold Air from Your Heater
When your heater starts blowing cold air, it can be frustrating and uncomfortable. Understanding the primary reasons behind this issue can help you troubleshoot effectively. Here are some common causes to consider:
- Thermostat Settings: Check if the thermostat is set to the desired temperature. Ensure it’s not set to “cool” mode, which would cause the system to blow cool air instead of warm.
- Dirty Air Filters: Clogged or dirty air filters can restrict airflow, leading to inefficiencies. A simple filter replacement can often remedy this issue.
- Inadequate Fuel Supply: For gas heaters, ensure there is enough fuel. A depleted fuel source or issues with gas pressure can prevent the heater from operating efficiently.
- Faulty Pilot Light: In gas heaters, a malfunctioning pilot light can interrupt combustion. If the pilot light is out, relight it according to the manufacturer’s instructions.
- Malfunctioning Blower Fan: The blower fan circulates heated air throughout your home. If it’s malfunctioning or broken, the system may fail to distribute warm air effectively.
- Leaky Ducts: Duct leaks can allow warm air to escape before reaching living spaces. Inspect ducts for any visible cracks or gaps and seal as needed.
- Heat Exchanger Issues: In systems that use a heat exchanger, any cracks or defects can cause the heater to blow cold air instead of heated air. This may require professional inspection.
- System Age: Older heating systems may lose efficiency over time. If your system is past its expected lifespan, it may be time for a replacement.
By identifying these common issues, you can take steps toward resolving the problem with your heater. If the issue persists, consider consulting a professional technician for further assistance.
Checking and Replacing the Air Filter
The air filter plays a crucial role in the efficiency and performance of your heating system. A clogged or dirty filter can obstruct airflow, causing the heater to blow cold air. Regularly checking and replacing the air filter is essential for maintaining optimal heating conditions.
Start by locating the air filter, which is typically found near the blower compartment or the return air duct. If you’re unsure where to find it, consult the heater’s user manual. Before removing the filter, turn off the heating system to ensure safety.
Carefully take out the filter and inspect it. If it appears visibly dirty or has excessive dust buildup, it needs to be replaced. Filters are usually measured by their dimensions, so make sure to note these specifications when purchasing a new one. Consider using a high-efficiency particulate air (HEPA) filter for better air quality.
When installing the new filter, make sure to follow the airflow direction indicated by arrows on the filter’s frame. Proper installation is vital to ensure the heater can circulate the air effectively. After replacing the filter, turn the heater back on and monitor its performance. Regular replacements every 1-3 months, especially during peak heating seasons, can prevent most airflow issues and keep your home cozy.
Inspecting the Thermostat Settings and Functionality
When a heater blows cold air, one of the first components to check is the thermostat. The thermostat regulates the temperature by controlling the heater’s operation, so ensuring its correct settings and functionality is crucial.
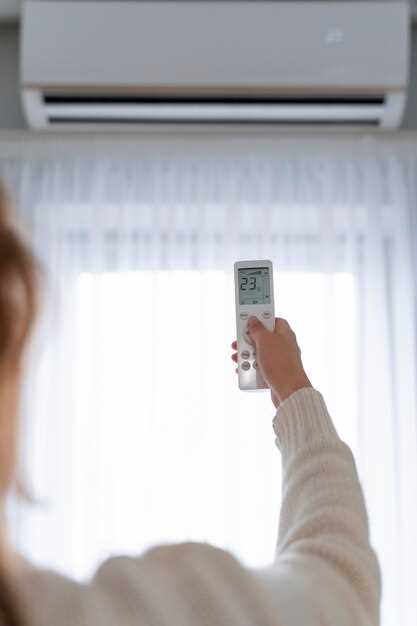
First, verify the thermostat settings. Make sure it is set to “heat” mode rather than “cool.” Additionally, check the temperature setting to ensure it is higher than the current room temperature. If it is set too low, the heater will not activate.
Next, examine the thermostat’s calibration. A thermostat that is out of calibration may inaccurately read the room temperature, resulting in improper operation of the heating system. To check calibration, compare the thermostat reading to a reliable thermometer placed in the same room. If the readings differ significantly, recalibration may be necessary.
Another important step is inspecting the thermostat for any damage or obstruction. Dust, debris, or misplaced objects can affect its ability to sense the temperature accurately. Clean the thermostat surface and ensure it is mounted securely without any obstructions around it.
If your thermostat is digital, check the batteries. Weak or dead batteries can lead to malfunctioning displays and inaccurate readings. Replace them if necessary to restore proper functionality.
Finally, consider the type of thermostat in use. If you have an older mechanical model, it may be less reliable than newer digital options. Upgrading to a programmable or smart thermostat can enhance efficiency and ensure more accurate temperature control.
In summary, by carefully inspecting the thermostat’s settings, calibration, physical condition, and power source, you can determine if it is the cause of your heater blowing cold air. Addressing these aspects may resolve the issue effectively.
Examining the Ductwork for Leaks or Blockages
The efficiency of a heating system greatly depends on the condition of its ductwork. If your heater is blowing cold air, one of the first areas to investigate is the ductwork. Leaks and blockages can significantly impact the performance of your heating system. Here’s how to examine the ductwork effectively.
First, inspect the ducts visually for any obvious signs of damage. Check for holes, cracks, or disconnected sections that could allow heated air to escape. Pay close attention to joints and seams, which are common areas for leaks.
| Signs of Duct Leaks | Possible Causes |
|---|---|
| High energy bills | Conditioned air escaping through leaks |
| Uneven heating | Blocked or leaking ducts |
| Unusual noises | Air rushing through obstructed areas |
| Increased dust levels | Dust and debris pulled in through leaks |
Next, check for blockages within the ductwork. Use a flashlight to inspect the interior of the ducts, looking for debris, dust buildup, or obstructions caused by pests. If you notice any significant blockages, professional cleaning may be required to ensure proper airflow.
Additionally, you can perform a simple test to detect leaks by turning on the heater and feeling for drafts around the duct joints and seams. If you notice cold air entering, it’s likely a sign of leakage that needs to be sealed.
Seal any leaks found using duct tape or a sealant specifically designed for ductwork. Ensure that all connections are tight and secure. In cases of extensive damage or difficulty accessing ductwork, consider hiring a professional technician for a thorough inspection and repair.
By examining your ductwork for leaks or blockages, you can significantly improve the efficiency of your heating system, ensuring warm air reaches every corner of your home.
Assessing the Pilot Light and Ignition System
The pilot light and ignition system are critical components of many heating systems, particularly gas heaters. When a heater blows cold air, the first step is to examine the pilot light. If the pilot light is out, the heater will not receive the necessary flame to ignite the gas. To check this, locate the pilot light assembly, which is usually found near the burner. If you find that the pilot light is extinguished, follow the manufacturer’s instructions to relight it. Ensure that you are following safety precautions, such as turning off the gas supply before attempting to relight the pilot.
Next, assess the condition of the pilot light flame. A healthy pilot flame should be blue with a yellow tip. If the flame is yellow or orange, it may indicate a buildup of dirt or debris, which can affect the heater’s performance. Cleaning the pilot assembly with a soft brush can help restore the flame to its proper condition. If the pilot light remains unstable or goes out frequently, further investigation into the thermocouple might be necessary, as a faulty thermocouple can disrupt the gas flow to the pilot light.
In addition to the pilot light, it is important to examine the ignition system, especially in units equipped with electronic ignition. A malfunctioning ignition system may prevent the heater from starting altogether. Check for any visible damage to the ignition components, including wires and connectors. If you suspect that the ignition control module is faulty, it may require replacement to restore proper heater operation.
Testing the ignition system often involves checking electrical continuity, which can be done with a multimeter. Proper voltage must be present for the ignition to function. If there is no voltage, inspect the wiring or connections for issues, and consider consulting a professional if necessary.
By carefully assessing both the pilot light and ignition system, homeowners can identify key issues that may be causing their heater to blow cold air. Regular maintenance and inspection of these components can help ensure that the heating system operates efficiently and effectively when needed.
When to Call a Professional for Heater Repairs

If your heater is blowing cold air consistently despite your troubleshooting efforts, it may indicate a more serious issue that requires professional intervention. Here are specific scenarios when it’s prudent to call a technician.
First, if you notice unusual sounds coming from your heater, such as banging, grinding, or screeching, it may signify mechanical failure or worn-out parts. These sounds often suggest that components like the blower motor or fan are failing, which might need professional assessment and repair.
Additionally, if your heater is cycling on and off frequently, known as short cycling, it can lead to higher energy bills and unnecessary wear on the system. This issue can be due to a malfunctioning thermostat, a clogged filter, or other underlying problems that a technician can diagnose correctly.
Another critical sign is a noticeable increase in your energy bills without any significant change in usage. This spike could indicate that your heater is working inefficiently due to issues that a professional can identify and remedy.
If you detect strange odors, such as a burning smell or a gas odor, it’s crucial to shut off the system immediately and call a professional. Burning odors may indicate overheating, while gas odors can signify a gas leak, both of which are serious safety hazards.
Furthermore, if your heater is older and has been malfunctioning more frequently, it may be wise to consult a professional. Aging systems can suffer from multiple issues that require expert knowledge to address effectively.
Lastly, if your DIY repairs or maintenance efforts have not resolved the problem after a few attempts, it is best to call a professional. Attempting to fix complex issues without expertise can lead to further damage and greater costs in the long run.


